Install_GHDL_WSL
Instalar GHDL en Ubuntu con WSL o Linux

#
-
wsl --install
#
Actualizamos e instalamos dependencias:
-
sudo apt update
sudo apt install -y wget zlib1g-dev gnat-13 unzip openjdk-25-jdk gtkwave build-essential
#
Obtenemos GHDL:
-
mkdir ghdl
wget "https://github.com/ghdl/ghdl/releases/download/v5.1.1/ghdl-gcc-5.1.1-ubuntu24.04-x86_64.tar.gz" -P ghdl/
cd ghdl
tar -xzvf ghdl*.gz --strip-components=1
rm g*.gz
Agregamos GHDL a .bashrc:
-
cd
echo 'export PATH="$HOME/ghdl/bin:$PATH"' >> $HOME/.bashrc
source .bashrc
#
Obtenemos Digital un fork de LogiSim:
-
cd
wget -c https://github.com/hneemann/Digital/releases/latest/download/Digital.zip
unzip Di*zip
rm Di*zip
Creamos un alias para Digital, asi lo lanzamos escribiendo en la Terminal digital :
-
cd
echo 'export PATH="$HOME/Digital:$PATH"' >> $HOME/.bashrc
echo 'alias digital=Digital.sh' >> $HOME/.bashrc
source .bashrc
#
Script para ejecutar todos los pasos de instalación automaticamente:
-
sudo apt update && sudo apt install -y curl
curl -sSL https://raw.githubusercontent.com/PIBSAS/Install_GHDL_WSL/main/ubuntu.sh | bash
source .bashrc
En PC con Ubuntu solo:
-
curl -sSL https://raw.githubusercontent.com/PIBSAS/Install_GHDL_WSL/main/ubuntu_24_04.sh | bash
source .bashrc
#
Desinstalar todo
-
wsl --unregister Ubuntu
#
Instalar GHDL en Debian con WSL o Linux

#
Trixie:
#
-
wsl --install Debian
Actualizamos e instalamos dependencias:
#### Trixie:
-
sudo apt update
sudo apt install -y wget zlib1g-dev gnat-13 unzip openjdk-25-jdk gtkwave build-essential
O directamente desde el repo de winget:
-
winget install Debian.Debian
Lo lanzamos con:
-
debian
Creamos usuario y contraseña. #
Obtenemos GHDL:
-
mkdir ghdl
wget "https://github.com/ghdl/ghdl/releases/download/v5.1.1/ghdl-gcc-5.1.1-ubuntu24.04-x86_64.tar.gz" -P ghdl/
cd ghdl
tar -xzvf ghdl*.gz --strip-components=1
rm g*.gz
Agregamos GHDL a .bashrc:
-
cd
echo 'export PATH="$HOME/ghdl/bin:$PATH"' >> $HOME/.bashrc
source .bashrc
#
Obtenemos Digital un fork de LogiSim:
-
cd
wget -c https://github.com/hneemann/Digital/releases/latest/download/Digital.zip
unzip Di*zip
rm Di*zip
Creamos un alias para Digital, asi lo lanzamos escribiendo en la Terminal digital :
-
cd
echo 'export PATH="$HOME/Digital:$PATH"' >> $HOME/.bashrc
echo 'alias digital=Digital.sh' >> $HOME/.bashrc
source .bashrc
#
Script para ejecutar todos los pasos de instalación automaticamente:
Debian Trixie:
-
sudo apt update && sudo apt install -y curl
curl -sSL https://raw.githubusercontent.com/PIBSAS/Install_GHDL_WSL/main/debian_trixie.sh | bash
source .bashrc
En PC con Debian Trixie solo:
-
curl -sSL https://raw.githubusercontent.com/PIBSAS/Install_GHDL_WSL/main/debian_trixie.sh | bash
source .bashrc
#
Desinstalar todo
-
wsl --unregister Debian
#
Instalar GHDL en Windows
![]()
#
- Verificamos cual es la última versión de GHDL
- Descarga 32 bit Última version 2023. ghdl-MINGW32
- Descomprimimos con el Explorador de Windows.
- O Desde PowerShell se puede descargar y descomprimir con:
- 32 bit:
-
cd $HOME\Downloads\
wget https://github.com/ghdl/ghdl/releases/download/v4.1.0/ghdl-MINGW32.zip -OutFile ghdl-MINGW32.zip
Expand-Archive ghdl*.zip -DestinationPath C:\
rm ghdl-MINGW32.zip
cd ..
-
- 64 bit:
-
cd $HOME\Downloads\
wget "https://github.com/ghdl/ghdl/releases/download/v5.1.1/ghdl-mcode-5.1.1-ucrt64.zip" -OutFile ghdl-UCRT64.zip
Expand-Archive ghdl*.zip -DestinationPath C:\
rm ghdl-UCRT64.zip
cd ..
Al ver
cd ..presionamos Enter.
-
- 32 bit:
Si descomprimimos con el Explorador de Windows Movemos a la unidad C la carpeta GHDL:
- 32 bit
-
cd $HOME\Downloads\
Move-Item -Path ghdl-MINGW32/GHDL -Destination C:\
cd ..
-
- 64bit:
-
cd $HOME\Downloads\
Move-Item -Path ghdl-UCRT64/GHDL -Destination C:\
cd ..
-
El ejecutable quedará en:
C:\GHDL\bin\
Usaremos esto después.
#
Obtenemos Digital un fork de LogiSim(Al final hay un enlace a un servidor para obtener pre-release version):
- Dependencia Descarga Java Runtime Environment >= 1.8.0
- O con Winget:
-
winget install "Java 8"
-
Descargando manualmente el zip o desde PowerShell:
- Descarga ZIP
- Descomprimir con el Explorador de Windows.
- O con PowerShell descargamos y descomprimimos:
-
cd $HOME\Downloads\
wget https://github.com/hneemann/Digital/releases/latest/download/Digital.zip -OutFile Digital.zip
Expand-Archive Di*.zip -DestinationPath C:\
rm Di*zip
cd ..
Al ver
cd ..presionamos Enter.
-
Si descomprimimos con el Explorador de Windows Movemos a la unidad C la carpeta Digital:
-
cd $HOME\Downloads\
Move-Item -Path Digital -Destination C:\
cd ..
El ejecutable quedará en:
-
C:\Digital\
Usaremos esto después.
#
Como editor de texto además de Digital, podemos utilizar Notepad++ que nos permite guardar con la extensión .vhdl al igual que el bloc de notas, pero detecta la sintaxis:
-
Con Winget:
-
winget install "notepad++"
-
#
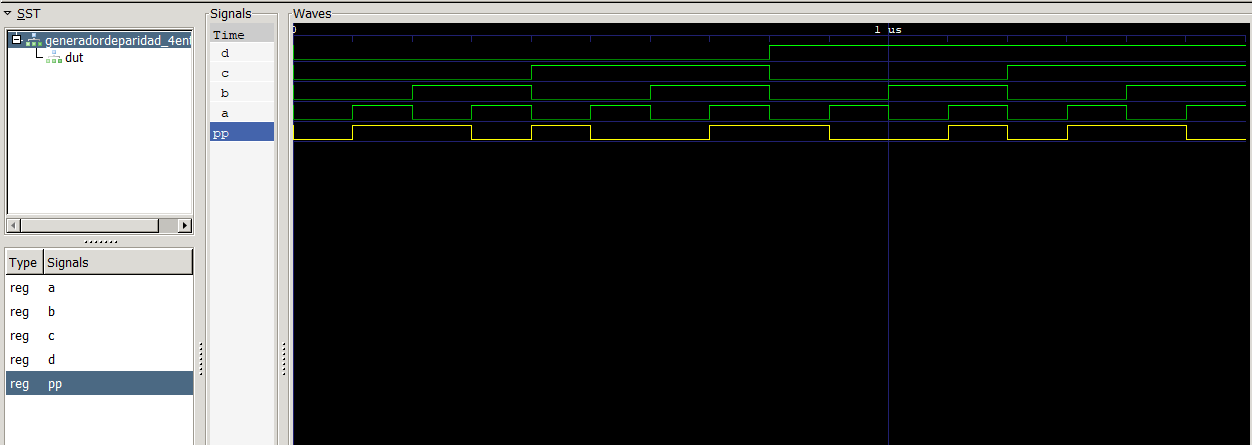
GTKWave
Visor de diagrama temporal archivo .vcd generado con GHDL.
Opción fácil, bajamos una versión antigua, que nos evita compilar GTKWave:
- Descargar 32 bit
- Descomprimimos con el Explorador de Windows.
- O Desde PowerShell se puede descargar y descomprimir con:
- 32 bit:
-
cd $HOME\Downloads\
Start-BitsTransfer -Source https://sourceforge.net/projects/gtkwave/files/gtkwave-3.3.100-bin-win32/gtkwave-3.3.100-bin-win32.zip/download -Destination gtkwave.zip
Expand-Archive gtk*.zip -DestinationPath C:\
rm gtk*.zip
cd ..
-
- 64 bit:
-
cd $HOME\Downloads\
Start-BitsTransfer -Source https://sourceforge.net/projects/gtkwave/files/gtkwave-3.3.100-bin-win64/gtkwave-3.3.100-bin-win64.zip/download -Destination gtkwave.zip
Expand-Archive gtk*.zip -DestinationPath C:\
rm gtk*.zip
Rename-Item -Path "C:\gtkwave64" -NewName "gtkwave"
cd ..
Al ver
cd ..presionamos Enter.
-
- 32 bit:
Si descomprimimos con el Explorador de Windows Movemos a la unidad C la carpeta gtkwave:
- 32 bit
-
cd $HOME\Downloads\
Move-Item -Path gtkwave -Destination C:\
cd ..
-
- 64bit
-
cd $HOME\Downloads\
Rename-Item -Path "C:\gtkwave64" -NewName "gtkwave"
Move-Item -Path gtkwave -Destination C:\
cd ..
Al ver
cd ..presionamos Enter.
-
El ejecutable quedará en:
-
C:\gtkwave\bin\Usaremos esto después. #
Agregamos las carpetas a las variable de entorno del Sitema para poder ejecutar desde la Terminal al solo escribir ghdl, Digital, gtkwave.
#
-
Buscamos Variables y nos saldrá el acceso a
Editar las variables de entorno del sistema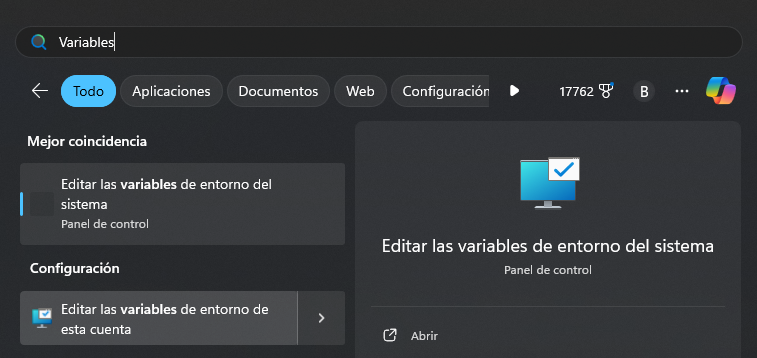
-
Pulsamos el botón
Variables de entorno...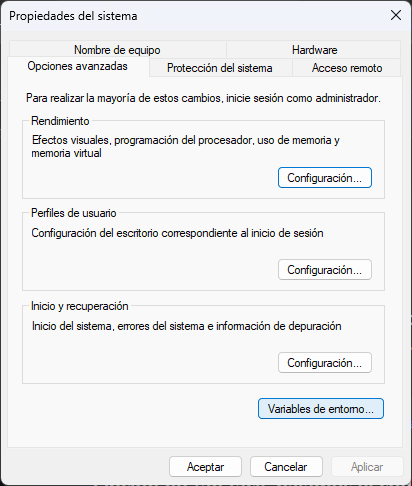
-
Se abre una nueva ventana, seleccionamos
Pathy pulsamosEditar...del recuadro superior.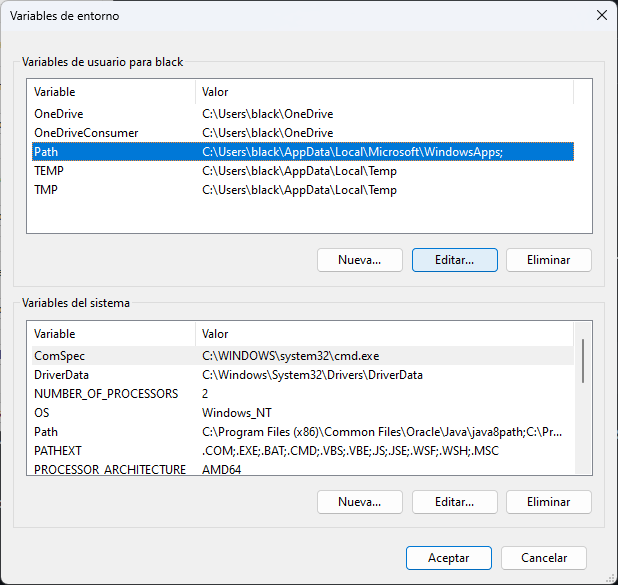
-
Se abre otra ventana, seleccionamos
Nuevo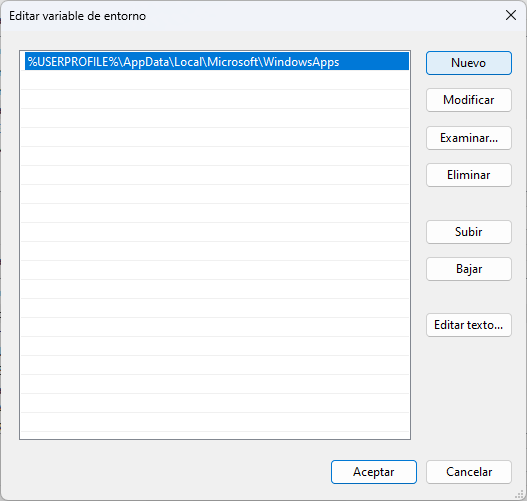
-
Ingresamos las 3 rutas de los ejecutables:
-
C:\GHDL\bin\ -
C:\Digital\ -
C:\gtkwave\bin\
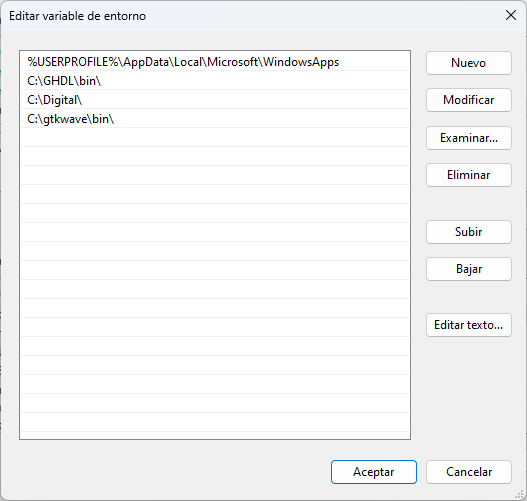
Pulsamos
Aceptaren cada ventana para cerrarlas.Abrimos una Terminal y comprobamos(no es necesario) que obtenemos respuesta al preguntar por las versiones de los ejecutables, excepto en Digital que solo se ejecutará.
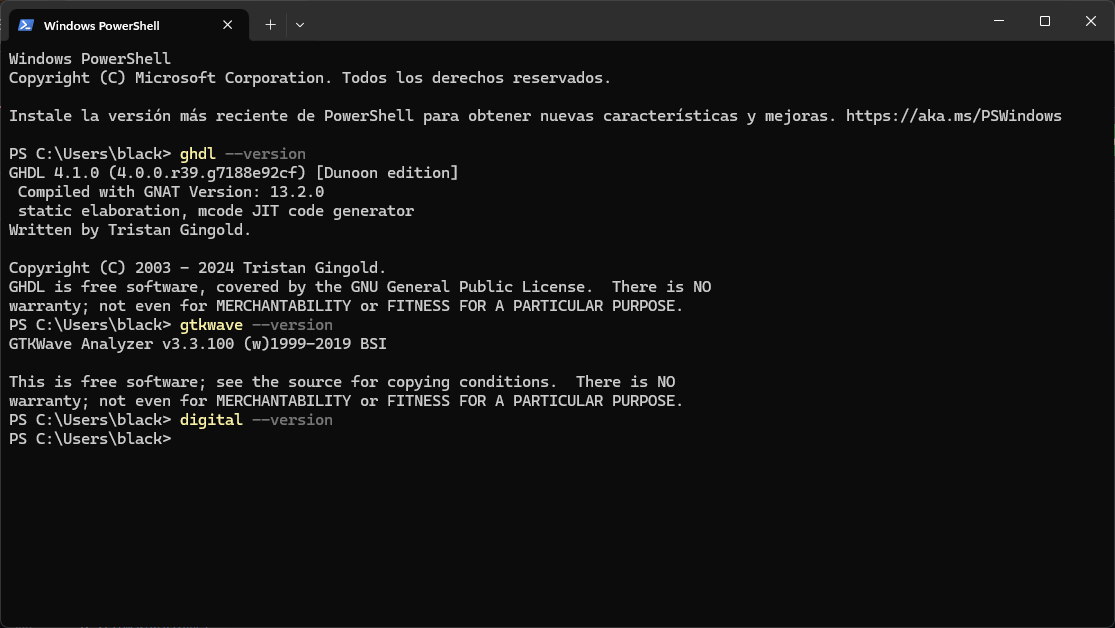
-
#
Script PowerShell para ejecutar todos los pasos de instalación automáticamente:
Aun deberemos agregar las variables de entorno, pero el resto se hará solo.
Abrimos una Terminal(Administrador) como admin, copiamos y pegamos estas 2 líneas, pulsa Enter. Agregar las variables de entorno y listo.
32bit:
-
Invoke-WebRequest -Uri "https://raw.githubusercontent.com/PIBSAS/Install_GHDL_WSL/main/VHDL_win_32bit.ps1" -OutFile "$env:TEMP\VHDL_win_32bit.ps1"
powershell -ExecutionPolicy Bypass -File "$env:TEMP\VHDL_win_32bit.ps1"
64bit:
-
Invoke-WebRequest -Uri "https://raw.githubusercontent.com/PIBSAS/Install_GHDL_WSL/main/VHDL_win_64bit.ps1" -OutFile "$env:TEMP\VHDL_win_64bit.ps1"
powershell -ExecutionPolicy Bypass -File "$env:TEMP\VHDL_win_64bit.ps1"
#
Video Script PowerShell Windows:
Click en imagen para abrir video en Youtube

#
Opción no tan fácil, bajamos el código fuente para compilar una versión más actual(últimos cambios hace 2 días):
Cygwin necesario para Compilar GTKWave:
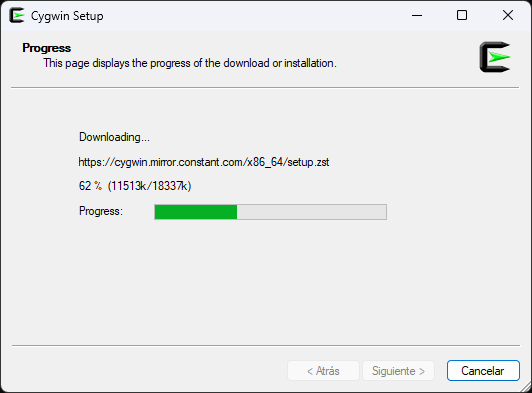
Ejecutamos el instalador:
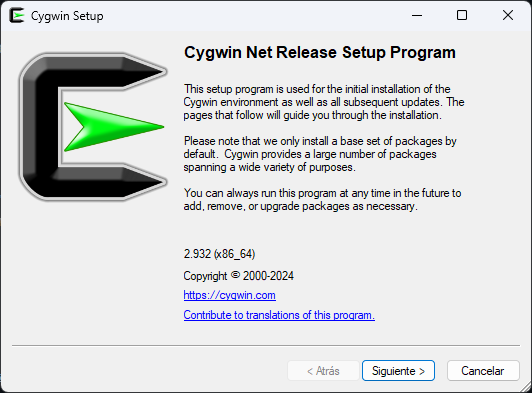
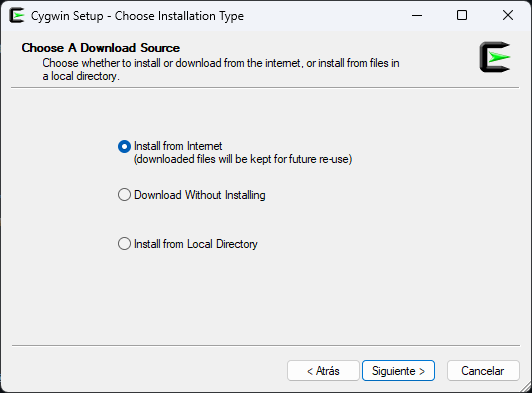
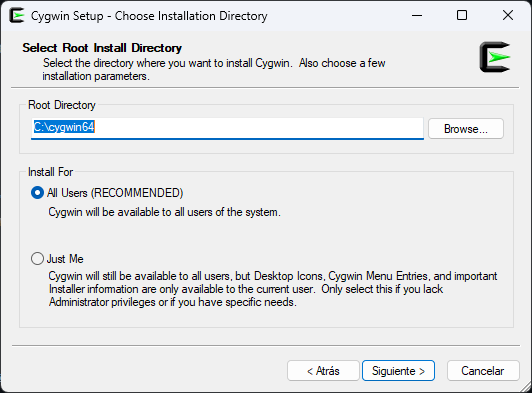
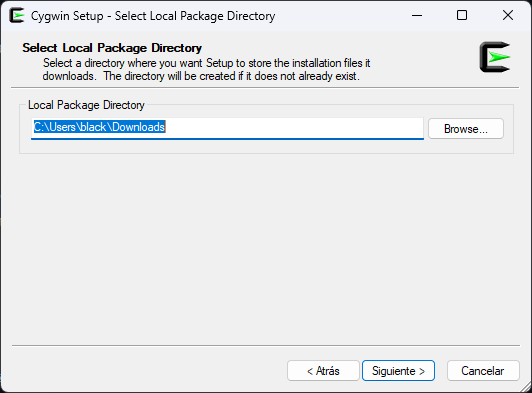

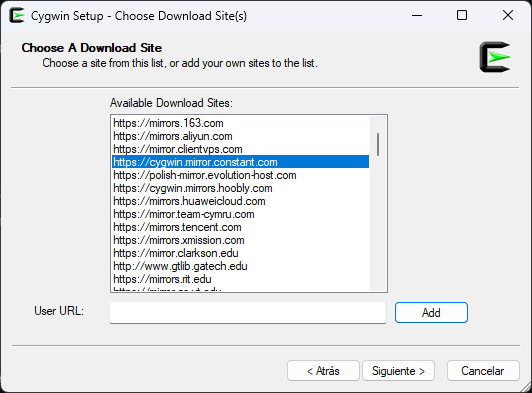
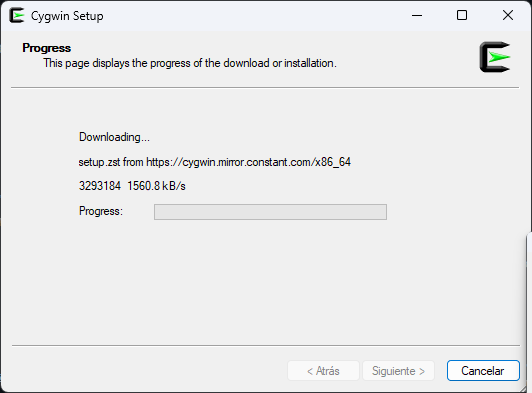
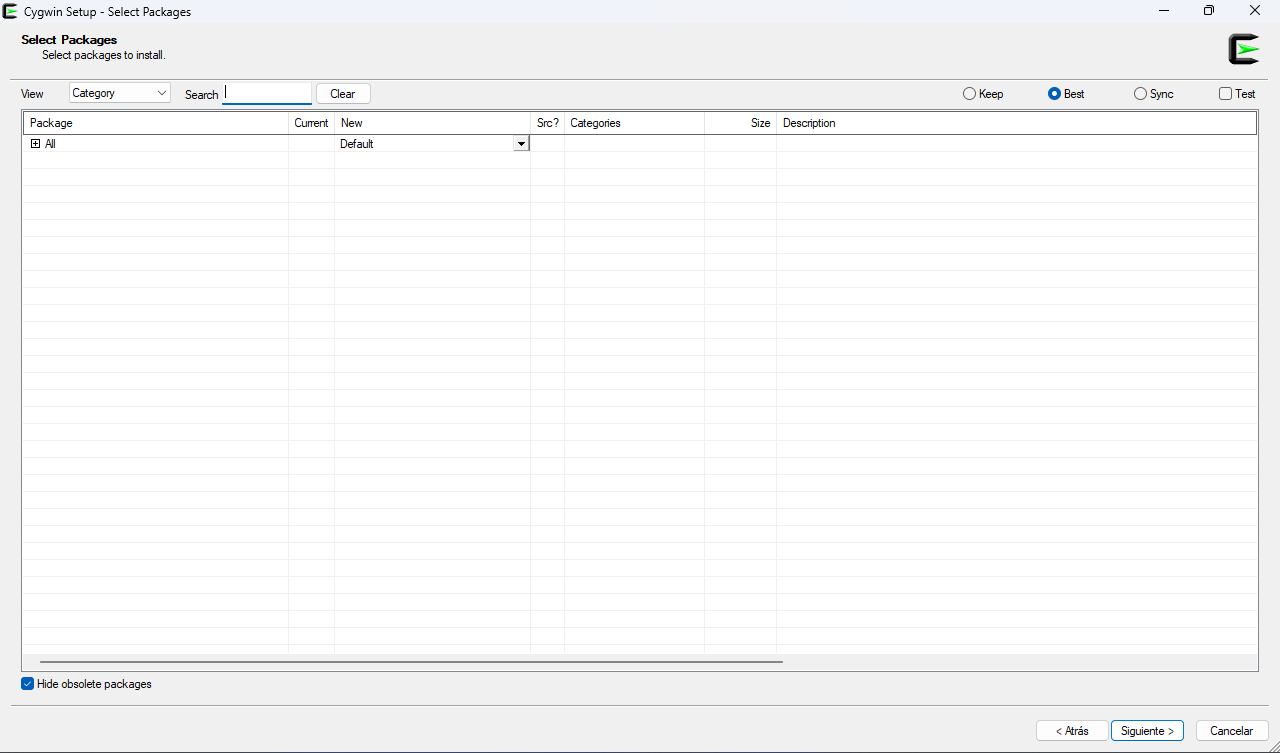
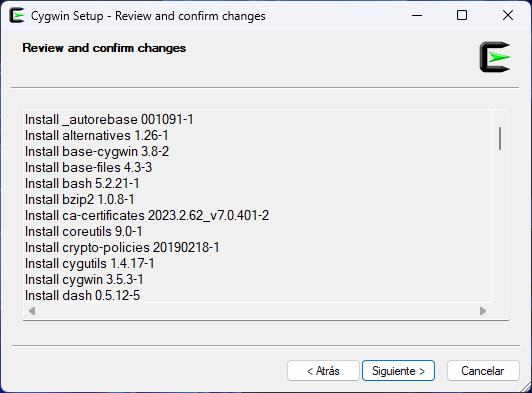
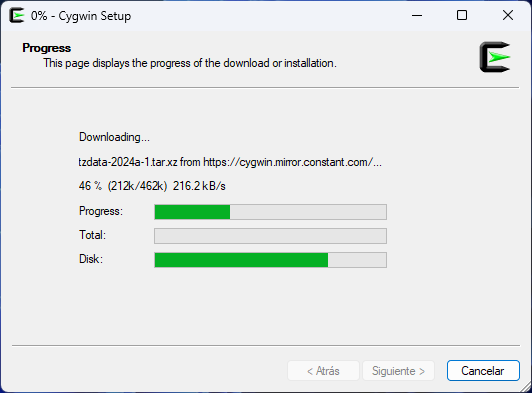
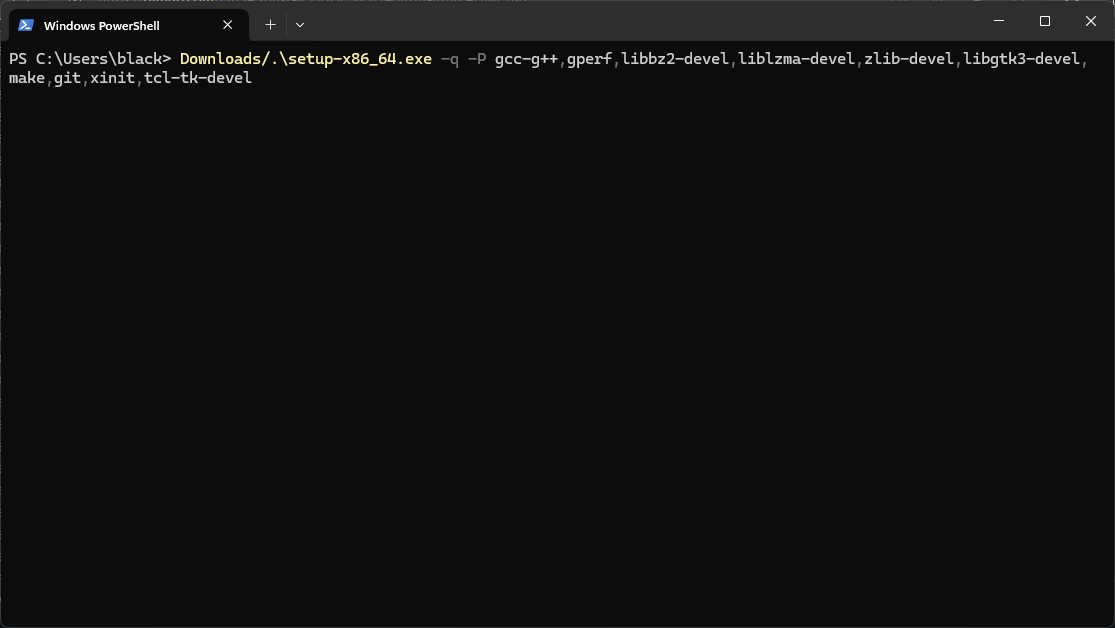
Una vez instalado usamos Cygwin para instalar las dependencias de GTKWave:
-
cd $HOME\Downloads\
.\setup-x86_64.exe -q -P gcc-g++,gperf,libbz2-devel,liblzma-devel,zlib-devel,libgtk3-devel,make,git,xinit,tcl-tk-devel,autotools-dev,automake,libJudy-devel
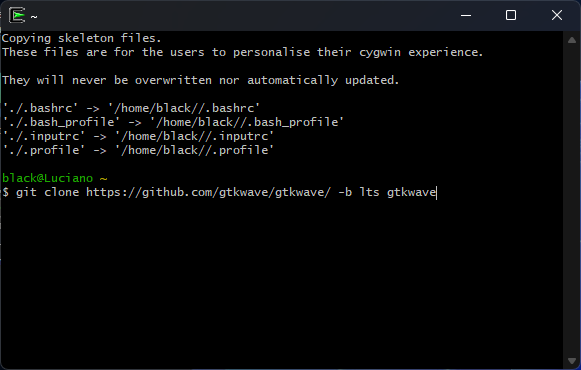
Abrimos la Terminal de Cygwin, clonamos la repo de GTKWave y Compilamos:
-
git clone https://github.com/gtkwave/gtkwave/ -b lts gtkwave
cd gtkwave/gtkwave3-gtk3 && ./autogen.sh
./configure --enable-gtk3 --enable-judy
make -j
make install
Ahora iniciamos XServer para poder ejecutar aplicaciones con GUI:
-
startxwinAparecerán 2 iconos de sistemas.

Luego abrimos otra Cygwin Terminal y lanzamos GTKWave:
-
gtkwaveO desde el icono del Sistema opción Accesorios -> GTKWave
#
Uso de GHDL para crear archivo .vcd para GTKWave:
- Creamos nuestro archivo
.vhdlcon Notepad++ o cualquier editor de texto. -
Abrimos una terminal donde se encuentre dicho archivo y realizamos los siguientes pasos: Detalle de la Sintaxis utilizada
-
ghdl -s archivo.vhdl
ghdl -s archivo_tb.vhdl
ghdl -a archivo.vhdl
ghdl -a archivo_tb.vhdl
ghdl -e archivo_tb
ghdl -r archivo_tb
ghdl -r archivo_tb --vcd=archivo.vcd
-
- Abrimos el
.vcdcreado con GTKWave:-
gtkwave archivo.vcd
Existe una sintaxis/convención respecto al nombre del archivo, que debe ser el nombre de la entidad de nuestra descripción para que no nos dé error.
-schequea error de sintaxis.-aanaliza la descripción.-eelabora la unidad.-rcorre/simula el diseño.TEMPLATE.vhdyTEMPLATE_TB.vhdusabanSTD_LOGIC_ARITHySTD_LOGIC_UNSIGNED, se las actualizo al Standard IEEE, ambas bibliotecas son propietarias de Xilinx, el Standard las reemplazó connumeric_std.all.- Por lo tanto deben comentarse ambas lineas o agregar lo siguiente a los comandos de ghdl(Esto ya no es necesario, pero queda por las dudas):
-
ghdl -s --std=08 --ieee=synopsys TEMPLATE.vhdEn sus diversas variantes.
En Digital el
archivo_tbno se necesita y tiene herramientas para ver en tiempo real(no muy preciso) el diagrama temporal.
-
Desinstalar todo
Como Desinstalar Cygwin correctamente:
Si el Sistema esta en Español abre CMD:
-
takeown /f C:\cygwin64 /r /d s
icacls C:\cygwin64 /t /grant todos:f
del /s /q C:\cygwin64
rmdir /s /q C:\cygwin64
Si el Sistema esta en Inglés abre CMD:
-
takeown /f C:\cygwin64 /r /d y
icacls C:\cygwin64 /t /grant everyone:f
del /s /q C:\cygwin64
rmdir /s /q C:\cygwin64
Eliminar el Acceso directo del escritorio manualmente, al no existir Cygwin tampoco existirá GTKWave(el compilado).
GHDL, GTKWave(Opción Fácil), Digital:
- Eliminar carpetas y las variables de entorno.
- Java Runtime Environment desde Panel de Control como cualquier app.
#
Digital crea Testbench automáticamente desde el Circuito si se usa la herramienta Test:
- Si, por ejemplo realizamos un circuito desde su expresión o realizando las conexiones, luego usamos la opción
Análisis -> Archivo -> Exportar el caso de prueba, copiamos su contenido, vamos al árbol de componentes, elegimos enVarios -> Caso de Pruebalo editamos por separado, pegamos la TV generada y le damos al botonOK, vamos aArchivo -> Exportar -> Exportar VHDLGuardamos con algún nombre, se guardan 2 archivos: -
archivo.vhdl archivo_Y_tb.vhdl - El cual si lo abrimos con notepad++ indica que no puede modificarse(Tranquilamente se puede), obviamente para su simulación en Digital. El Testbench no pasa un
ghdl archivo_Y_tb.vhdl - indicandonos un warning:
-
PS C:\Users\black\Documents> ghdl -s .\c4_ej7.vhdl PS C:\Users\black\Documents> ghdl -s .\c4_ej7_Y_tb.vhdl .\c4_ej7_Y_tb.vhdl:22:24:warning: declaration of "a" hides signal "A" [-Whide] function to_string ( a: std_logic_vector) return string is .\c4_ej7_Y_tb.vhdl:23:16:warning: declaration of "b" hides signal "B" [-Whide] variable b : string (1 to a'length) := (others => NUL); - Pero en Digital se simula tranquilamente. Entonces podemos pasar el warning con:
-
ghdl -s -Wno-hide .\c4_ej7_Y_tb.vhdlEste warning no sucede si a las entradas no las nombramos D,C,B,A en otro ejemplo se usa B3,B2,B1,B0 y no hubo ningún warning.
Descripciones generadas por Digital:
Descripción c4_ej7.vhdl generada del circuito de la expresión Z=!( (B+C). !( (A.B)+C ) ):
-
-- generated by Digital. Don't modify this file!
-- Any changes will be lost if this file is regenerated.

LIBRARY ieee;
USE ieee.std_logic_1164.all;
USE ieee.numeric_std.all;

entity main is
  port (
    A: in std_logic;
    B: in std_logic;
    C: in std_logic;
    Y: out std_logic);
end main;

architecture Behavioral of main is
begin
  Y <= NOT (NOT ((A AND B) OR C) AND (B OR C));
end Behavioral;
Testbench c4_ej7_Y.vhdl:
-
--  A testbench for c4_ej7_Y_tb
LIBRARY ieee;
USE ieee.std_logic_1164.all;
USE ieee.numeric_std.all;

entity c4_ej7_Y_tb is
end c4_ej7_Y_tb;

architecture behav of c4_ej7_Y_tb is
  component main
    port (
      A: in std_logic;
      B: in std_logic;
      C: in std_logic;
      Y: out std_logic);
  end component;

  signal A : std_logic;
  signal B : std_logic;
  signal C : std_logic;
  signal Y : std_logic;
  function to_string ( a: std_logic_vector) return string is
      variable b : string (1 to a'length) := (others => NUL);
      variable stri : integer := 1;
  begin
      for i in a'range loop
          b(stri) := std_logic'image(a((i)))(2);
      stri := stri+1;
      end loop;
      return b;
  end function;
begin
  main_0 : main port map (
    A => A,
    B => B,
    C => C,
    Y => Y );
  process
    type pattern_type is record
      C : std_logic;
      B : std_logic;
      A : std_logic;
      Y : std_logic;
    end record;
    type pattern_array is array (natural range <>) of pattern_type;
    constant patterns : pattern_array := (
      ('0', '0', '0', '1'), -- i=0
      ('0', '0', '1', '1'), -- i=1
      ('0', '1', '0', '0'), -- i=2
      ('0', '1', '1', '1'), -- i=3
      ('1', '0', '0', '1'), -- i=4
      ('1', '0', '1', '1'), -- i=5
      ('1', '1', '0', '1'), -- i=6
      ('1', '1', '1', '1'));
  begin
    for i in patterns'range loop
      A <= patterns(i).A;
      B <= patterns(i).B;
      C <= patterns(i).C;
      wait for 10 ns;
      assert std_match(Y, patterns(i).Y) OR (Y = 'Z' AND patterns(i).Y = 'Z')
        report "wrong value for Y, i=" & integer'image(i)
         & ", expected " & std_logic'image(patterns(i).Y) & ", found " & std_logic'image(Y) severity error;end loop;
    wait;
  end process;
end behav;
Captura el único caso donde
Z = 0:

Video Crear VHDL y Testbench:
Click en imagen para abrir video en Youtube

Para la Raspberry Pi
Script para ejecutar todos los pasos de instalación automaticamente:
-
curl -sSL https://raw.githubusercontent.com/PIBSAS/Install_GHDL_WSL/main/raspberry.sh | bash
#
Documentación
- GHDL
- Digital
- Digital Pre-Release Server
- Manual GTKWave
- GitHub GTKWave
- SourceForge GTKWave
- Teoría CIS221
- GitHub Repo CIS221
- Lab Manual CIS221
- GitHub Repo CIS221_Lab_Manual
- YouTube CIS221 LogiSim Evolution Sirve para Digital
- VHDL Tutorial Universidad de California
- Como escribir VHDL Testbench
- Video utilizado de base
- Introducción a VHDL
- Web VHDL
- Testbench Creator Online
- VHDL online Workshop
- Wikilibros Programación VHDL y Ejemplos
- Como generar Testbench Explicación
- ieee.numeric_std.all
- IEEE Standard VHDL Language Reference Manual PDF
- IEEE Standard VHDL Language Reference Manual Online Actual
GTKWave: